
Break of Structure (BoS) and Change of Character (CHoCH) Trading Strategy
Master the core concepts of BoS and CHoCH to identify key turning points in the market.
Last Updated: December 9, 2025
Prefer video? Watch me break down the Ichimoku Cloud indicator and trading strategy in this quick, easy-to-follow YouTube tutorial.
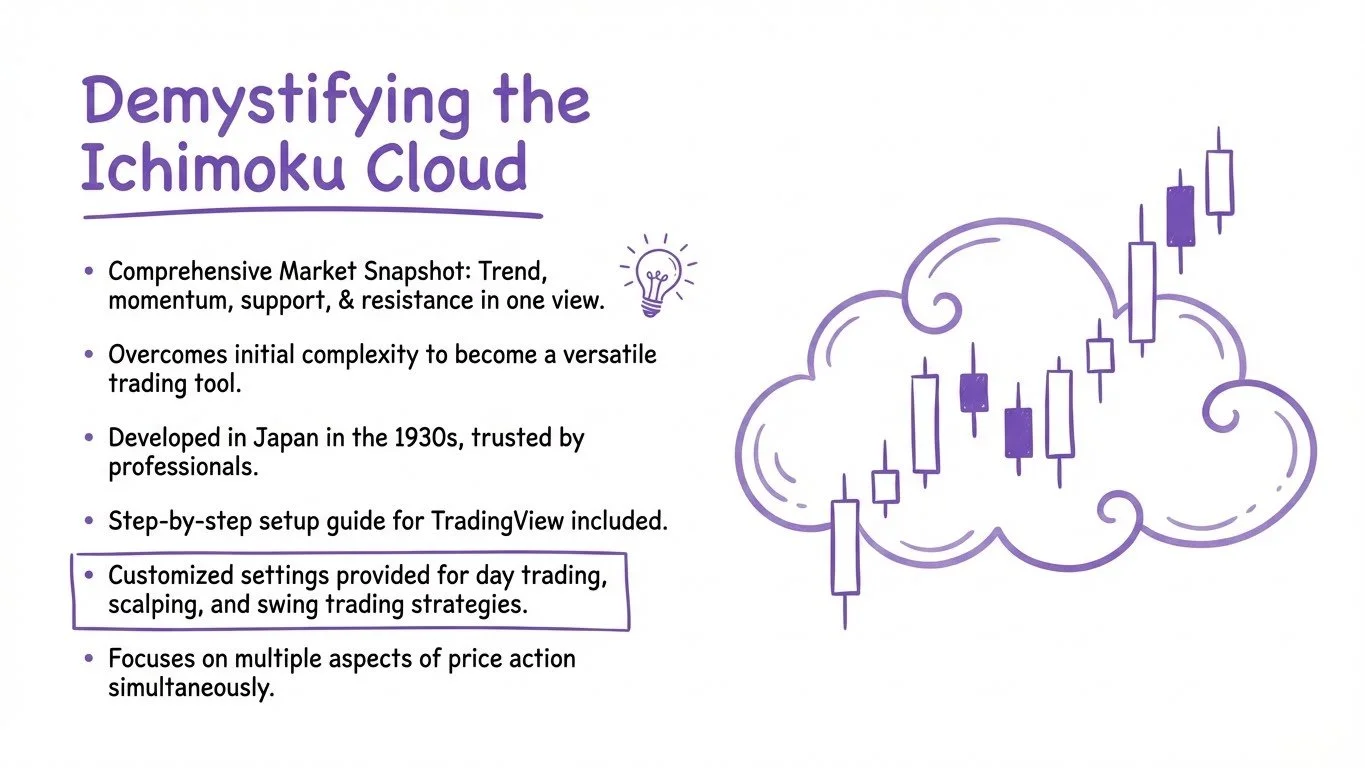
The Ichimoku Cloud is an all-in-one technical indicator that shows trend direction, momentum, and support/resistance levels at a glance.
The cloud consists of five components: Conversion Line (blue), Base Line (orange), Leading Span A (green), Leading Span B (red), and the Cloud area itself.
A bullish signal occurs when price is above the cloud, the cloud is green, and the Conversion Line is above the Base Line.
You can customize Ichimoku settings for different trading styles—faster settings (6, 13, 26) for day trading/scalping and slower settings (12, 24, 120) for swing trading.
For best results, combine Ichimoku signals with price action patterns and market structure analysis rather than relying on the indicator alone.
Disclaimer: The information provided in this article is for educational purposes only and should not be considered as financial advice. Trading involves risk, and past performance is not indicative of future results. Always conduct your own research and consider your financial situation before making any trading decisions.
Ichimoku Cloud Indicator Explained
The Ichimoku Cloud might look intimidating at first glance with its colorful lines and shaded areas that seem to cover your entire chart. Many traders avoid using this powerful indicator simply because it appears too complex. But what if I told you that once you understand it, the Ichimoku Cloud can become one of the most versatile tools in your trading arsenal?
Unlike most technical indicators that focus on just one aspect of price action, the Ichimoku Cloud gives you a complete market snapshot at a glance. It simultaneously shows trend direction, momentum, and key support/resistance levels—all in one indicator. This comprehensive view is exactly why professional traders have been using it since its development in Japan in the late 1930s.
In this guide, I'll break down the Ichimoku Cloud step-by-step, showing you exactly how to set it up in TradingView, what each component means, and how to use it effectively for different trading styles. I'll also share customized settings for day trading, scalping, and swing trading to help you adapt the indicator to your specific strategy.

What is the Ichimoku Cloud? The Ichimoku Cloud is a trading indicator with multiple components. The indicator shows support and resistance levels, identifies trend direction and generates other kinds of technical analysis signals.
The Ichimoku Cloud (or Ichimoku Kinko Hyo in Japanese) is a comprehensive technical indicator developed by Japanese journalist Goichi Hosoda in the late 1930s. The name roughly translates to "one glance equilibrium chart," which perfectly describes its purpose: to provide a complete market analysis at a single glance.
What makes the Ichimoku Cloud special is that it combines multiple indicators into one cohesive system. While most indicators focus on either trend, momentum, or support/resistance levels, the Ichimoku Cloud displays all three simultaneously.
The indicator consists of five main components:
Conversion Line (Tenkan-sen) - Shows short-term market momentum
Base Line (Kijun-sen) - Shows medium-term trend direction
Leading Span A (Senkou Span A) - Forms one edge of the cloud
Leading Span B (Senkou Span B) - Forms the other edge of the cloud
Lagging Span (Chikou Span) - Shows market sentiment (often hidden to simplify the chart)
Together, these components create a "cloud" formation on your chart that helps identify the prevailing trend, support and resistance levels, and potential trading opportunities.
There are several compelling reasons to incorporate the Ichimoku Cloud into your trading strategy:
Instead of cluttering your chart with multiple indicators (moving averages, oscillators, support/resistance lines), the Ichimoku Cloud gives you all this information in a single indicator. This streamlined approach helps you make faster, more confident trading decisions.
Unlike many technical indicators that only show what has already happened, the Ichimoku Cloud projects support and resistance levels into the future. This forward-looking feature helps you anticipate potential price movements before they occur.
Whether you trade forex, stocks, cryptocurrencies, or futures, the Ichimoku Cloud works effectively across all markets. Its principles apply universally to any financial instrument that has sufficient trading volume and trending behavior.
When properly understood, the Ichimoku Cloud provides unmistakable trading signals. Cloud color changes, crossovers between lines, and price position relative to the cloud all offer clear guidance for potential entries and exits.
Let's break down each component of the Ichimoku Cloud to understand what they measure and how they work together:
Formula: (9-period High + 9-period Low) / 2
Purpose: Shows short-term market momentum and acts as dynamic support/resistance.
Signal: Price above = bullish momentum; Price below = bearish momentum
Formula: (26-period High + 26-period Low) / 2
Purpose: Shows medium-term trend direction and stronger support/resistance.
Signal: Price above = bullish trend; Price below = bearish trend
Formula: (Conversion Line + Base Line) / 2 [projected 26 periods ahead]
Purpose: Forms one edge of the cloud, reacts faster to price changes.
Signal: Above Leading Span B = bullish cloud; Below Leading Span B = bearish cloud
Formula: (52-period High + 52-period Low) / 2 [projected 26 periods ahead]
Purpose: Forms the other edge of the cloud, moves more slowly, represents longer-term sentiment.
Signal: Creates support/resistance zones with Leading Span A
Composition: Area between Leading Span A and Leading Span B
Color: Green when Leading Span A > Leading Span B (bullish), Red when Leading Span A < Leading Span B (bearish)
Function: Acts as dynamic support when price is above, resistance when price is below
Thickness: Thicker cloud = stronger support/resistance, Thinner cloud = weaker support/resistance
Formula: Current Close [shifted 26 periods back]
Purpose: Confirms signals and shows market sentiment
Note: Often hidden to simplify chart interpretation
The Conversion Line is calculated as the midpoint of the highest high and lowest low over the past 9 periods (candles). With standard settings, this represents:
Conversion Line = (9-period High + 9-period Low) / 2Think of the Conversion Line as a dynamic support/resistance level that shows short-term market momentum. When price is above this line, short-term momentum is bullish; when below, momentum is bearish.
The Base Line calculates the midpoint of the highest high and lowest low over the past 26 periods:
Base Line = (26-period High + 26-period Low) / 2The Base Line represents medium-term trend direction. It acts as a stronger support/resistance level and can be used as a trailing stop or potential reversal point. When price is above this line, the medium-term trend is bullish; when below, it's bearish.
Leading Span A is the midpoint of the Conversion Line and Base Line, projected 26 periods into the future:
Leading Span A = (Conversion Line + Base Line) / 2 [projected 26 periods ahead]This creates one edge of the cloud formation. Leading Span A reacts faster to price changes since it incorporates the Conversion Line.
Leading Span B calculates the midpoint of the highest high and lowest low over the past 52 periods, projected 26 periods into the future:
Leading Span B = (52-period High + 52-period Low) / 2 [projected 26 periods ahead]This forms the other edge of the cloud. Leading Span B moves more slowly and represents longer-term market sentiment.
The cloud itself is the area between Leading Span A and Leading Span B. Its color indicates the market bias:
When Leading Span A is above Leading Span B, the cloud is green (bullish)
When Leading Span A is below Leading Span B, the cloud is red (bearish)
The cloud serves as dynamic support and resistance. When price is above the cloud, it acts as support; when price is below the cloud, it acts as resistance.
The Lagging Span is simply the current closing price plotted 26 periods back:
Lagging Span = Current Close [shifted 26 periods back]In this guide, we'll often hide the Lagging Span to simplify our chart interpretation, but some traders use it to confirm signals.
Setting up the Ichimoku Cloud in TradingView is straightforward, but I recommend making a few adjustments to the default settings for better visualization:
Setting up the Ichimoku Cloud in TradingView is straightforward, but making a few adjustments to the default settings will give you better visualization and trading insights.
To make the indicator easier to read, make these visual changes:
Conversion Line: Make thicker for better visibility
Base Line: Change color to orange and make thicker
Lagging Span: Uncheck to reduce chart clutter
Leading Span A: Make green line thicker
Leading Span B: Make red line thicker
Optional: Choose brighter colors for clearer distinction
With these optimized settings, you'll have a much cleaner view of trend direction, momentum, and support/resistance levels—all in one indicator. For the best experience with advanced charting features, consider upgrading to TradingView Premium.
Try TradingView Premium - Get $15 Bonus & 30-Day Free AccessClick on the "Indicators" button at the top of your TradingView chart
In the search bar, type "Ichimoku Cloud" or simply "Ichimoku"
Click on the standard "Ichimoku Cloud" indicator (not the community versions)
To make the indicator easier to read, I recommend these visual changes:
Click the settings gear icon for the Ichimoku Cloud
Under "Styles," make these adjustments:
Make the Conversion Line (blue) thicker for better visibility
Change the Base Line color to orange and make it thicker
Uncheck the Lagging Span to reduce chart clutter
Make the Leading Span A (green) and Leading Span B (red) lines thicker
Optionally, choose brighter colors to distinguish the lines more clearly
After adjusting the settings, click "OK" to apply the changes to your chart. You should now see a cleaner Ichimoku Cloud setup with clearly visible components.
The standard Ichimoku Cloud settings (9, 26, 52) were designed for daily charts of the Japanese stock market. However, these settings can be adjusted to better suit different trading styles and timeframes:
These settings work well on daily charts and for swing trading. They provide a balanced view of market conditions without being too sensitive or too sluggish.
For day traders and scalpers who need faster signals:
Conversion Line: 6 (instead of 9)
Base Line: 13 (instead of 26)
Leading Span B: 26 (instead of 52)
Displacement: 26 (unchanged)
These settings make the indicator more responsive to price changes, generating signals more quickly. The tradeoff is that you'll get more signals, including more potential false signals.
For swing traders and investors focusing on larger moves:
Conversion Line: 12 (instead of 9)
Base Line: 24 (instead of 26)
Leading Span B: 120 (instead of 52)
Displacement: 26 (unchanged)
These settings provide fewer but potentially stronger signals and are better suited for longer-term trading on higher timeframes.
Now let's get to the practical part—how to use the Ichimoku Cloud to identify trading opportunities. Here's a straightforward trading strategy based on the Ichimoku Cloud:
All three conditions must align for the strongest signals
Short-term momentum, medium-term trend, and long-term sentiment are all bullish. Look for long entries.
Short-term momentum, medium-term trend, and long-term sentiment are all bearish. Look for short entries.
Pro Tip: The strongest signals occur when all three conditions align AND price is pulling back to the Conversion Line or Base Line. This confluence provides optimal risk-to-reward entries.
A strong bullish signal occurs when all three of these conditions are met:
Price is above the cloud
The cloud is green (Leading Span A above Leading Span B)
The Conversion Line (blue) is above the Base Line (orange)
When all three conditions align, you have a strong confirmation of a bullish trend. This alignment indicates that short-term momentum, medium-term trend, and longer-term sentiment are all pointing upward.
Conversely, a strong bearish signal occurs when:
Price is below the cloud
The cloud is red (Leading Span A below Leading Span B)
The Conversion Line (blue) is below the Base Line (orange)
This alignment indicates a bearish trend across all timeframes.
For Long Positions:
Wait for all three bullish conditions to be met
Enter when price pulls back to the Conversion Line or Base Line and bounces
Alternative entry: Wait for a pullback that respects the top of the cloud as support
For Short Positions:
Wait for all three bearish conditions to be met
Enter when price rallies to the Conversion Line or Base Line and rejects
Alternative entry: Wait for a rally that respects the bottom of the cloud as resistance
For long positions: Place stop loss below the Base Line or below the cloud
For short positions: Place stop loss above the Base Line or above the cloud
First target: When price reaches the next significant support/resistance level
Second target: When the Conversion Line crosses below the Base Line (for longs) or above the Base Line (for shorts)
Final target: When price touches the opposite side of the cloud
The thickness of the Ichimoku Cloud provides valuable information about market conditions:
A thick cloud (large distance between Leading Span A and B) indicates:
Strong support or resistance levels
Potential for a significant reversal if price breaks through
Higher confidence in the trend direction
Thick clouds are more difficult for price to penetrate, making them stronger support/resistance zones. When price approaches a thick cloud from above or below, expect it to act as a strong bouncing point.
A thin cloud (small distance between Leading Span A and B) indicates:
Weaker support or resistance
Easier for price to break through
Potential for a trend change
Thin clouds often appear during consolidation phases or at the beginning of new trends. Price can more easily penetrate a thin cloud, so be prepared for potential breakouts.
When Leading Span A and Leading Span B cross each other, creating a "twist" in the cloud, this often indicates a potential trend change. Pay close attention to these twist points as they can provide early warnings of reversals.
Pro Tip: Pay special attention to price action when it approaches thick clouds from either direction. These areas often provide the strongest bounce points for counter-trend trades, while breakouts through them can signal powerful trend continuations.
Let's explore in more detail how to customize the Ichimoku Cloud for specific trading approaches:
Day traders and scalpers need faster signals to capture short-term price movements. Here's how to optimize the Ichimoku Cloud for short-term trading:
Open the Ichimoku Cloud settings
Navigate to the "Inputs" tab
Change the settings to:
Conversion Line: 6
Base Line: 13
Leading Span B: 26
Displacement: 26
These reduced values make the indicator more sensitive to recent price action, generating signals more quickly. This is particularly useful on shorter timeframes like 5-minute, 15-minute, or 1-hour charts.
The tradeoff with these faster settings is that you'll receive more signals, including more potential false signals. Always combine these signals with additional confirmation, such as price action patterns or volume analysis.
Swing traders and trend followers aim to capture larger price movements over days or weeks. Here's how to optimize the Ichimoku Cloud for longer-term trading:
Open the Ichimoku Cloud settings
Navigate to the "Inputs" tab
Change the settings to:
Conversion Line: 12
Base Line: 24
Leading Span B: 120
Displacement: 26
These expanded values make the indicator less sensitive to short-term fluctuations, focusing instead on the underlying trend. This is particularly useful on 4-hour, daily, or weekly charts.
The benefit of these slower settings is that they produce fewer but potentially stronger signals. When a signal does appear, it often indicates a significant trend that could last for an extended period.
While the Ichimoku Cloud is powerful on its own, combining it with other technical analysis methods can significantly enhance your trading results:
One of the most effective combinations is Ichimoku Cloud with price action analysis. Look for:
Candlestick patterns (engulfing patterns, hammer/shooting star) at cloud boundaries
Chart patterns (triangles, pennants) forming as price interacts with the cloud
Support/resistance levels aligning with the Conversion or Base Lines
For example, if price pulls back to the Conversion Line during a bullish trend and forms a bullish engulfing pattern, this provides a strong entry signal.
Market structure analysis complements the Ichimoku Cloud perfectly:
Look for higher highs and higher lows forming above the cloud in bullish trends
Watch for lower highs and lower lows forming below the cloud in bearish trends
Identify potential trend changes when market structure breaks at cloud twists
For instance, a break of market structure coinciding with price crossing through the cloud often signals a significant trend reversal.
Volume provides confirmation for Ichimoku signals:
Strong volume on cloud breakouts increases the significance of the signal
Declining volume as price approaches the cloud may indicate a potential reversal
Volume spikes at Conversion/Base Line crossovers can confirm the signal strength
A price breakout through the cloud accompanied by above-average volume provides a much stronger signal than a breakout on low volume.
The Ichimoku Cloud indicator measures multiple aspects of price action: trend direction, momentum, and support/resistance levels. It analyzes different timeframes simultaneously by averaging price over various periods (9, 26, and 52 by default) and projecting some components into the future to create a forward-looking indicator. This comprehensive approach helps traders see the overall market context "at a glance" rather than having to use multiple separate indicators.
The Ichimoku Cloud works effectively in any financial market with sufficient liquidity and trending behavior. It performs well in forex, stock, cryptocurrency, and futures markets. The indicator was originally developed for the Japanese stock market, but its principles apply universally to all markets where price trends develop. Some traders adjust the settings based on the specific volatility characteristics of different assets, but the core interpretation remains the same.
No, you don't need to use all components. Many traders focus on specific parts of the Ichimoku system based on their trading style. For example, some traders primarily use the cloud itself for trend direction and support/resistance, while others focus on crossovers between the Conversion and Base lines. Some traders even disregard the Lagging Span entirely (as suggested in this guide). You can customize which components to display in your charting platform and focus on the elements that provide the most value for your specific trading approach.
The Ichimoku Cloud works on all timeframes, but many traders find it most effective on intermediate and higher timeframes (1-hour charts and above). On very low timeframes (1-5 minutes), the indicator can generate more noise and false signals. For day trading, the 15-minute to 1-hour charts often provide good balance. For swing trading, the 4-hour, daily, and weekly charts typically work best. The higher the timeframe, the more reliable and significant the signals tend to be, though they will be less frequent.
The standard settings are: Conversion Line (9), Base Line (26), Leading Span B (52), and displacement (26). These were originally optimized for daily charts of Japanese stocks. You might consider changing them when: 1) Trading different timeframes (lower settings for lower timeframes), 2) Trading especially volatile markets like cryptocurrencies, 3) When you want faster signals for day trading (lower numbers) or stronger trend confirmation for swing trading (higher numbers). However, many traders prefer to keep the standard settings to ensure they're seeing the same signals as other market participants.
The Ichimoku Cloud may appear complex at first glance, but as we've explored in this guide, it's actually a remarkably intuitive system once you understand its components. By providing trend direction, momentum, and support/resistance levels all in one indicator, it streamlines your analysis and helps you make more confident trading decisions.
Remember that the key to success with the Ichimoku Cloud is proper interpretation and patience. Don't rush to trade every signal—instead, look for the strongest setups where multiple components align to confirm the trend. The most powerful signals occur when price, cloud color, and line positions all tell the same story.
For best results, I strongly recommend combining the Ichimoku Cloud with price action analysis and market structure. No indicator works perfectly in isolation, and even the comprehensive Ichimoku system benefits from additional confirmation.
Finally, don't be afraid to experiment with different settings to find what works best for your trading style and timeframe. The standard settings work well as a starting point, but customizing the indicator can help you fine-tune it to your specific needs.
If you're new to the Ichimoku Cloud, start by practicing on a demo account until you become comfortable with its signals. With time and experience, this powerful indicator may well become an indispensable part of your trading toolkit.
Ready to take your technical analysis skills to the next level? Check out my other guides on trading indicators, price action, and market structure to build a comprehensive trading strategy.
Remember: The Ichimoku Cloud is a tool to help inform your trading decisions—not a guarantee of success. Always manage your risk appropriately and never rely on any single indicator for your trading decisions.
Master the core concepts of BoS and CHoCH to identify key turning points in the market.
Learn how to classify price levels to find the highest probability trading opportunities.
Discover how institutional traders hunt for liquidity and how you can profit from these movements.
Explore how Fair Value Gaps provide precise entry opportunities in trending markets.
Trading & Investing Enthusiast
Teaching traders to understand market psychology, technical analysis, and investing through clear beginner-friendly insights.
Started investing at 16 and became fascinated by how market psychology influences price movements. Still learning something new every day.
Love sharing what I've learned along the way. There's nothing quite like helping someone understand a concept that once confused me too.
Proud to have built a community where traders actively share insights and grow together through daily market analysis and discussion.
Want to join our learning journey?
Master Ichimoku Trading with premium charting tools, unlimited indicators, and cloud crossover alerts